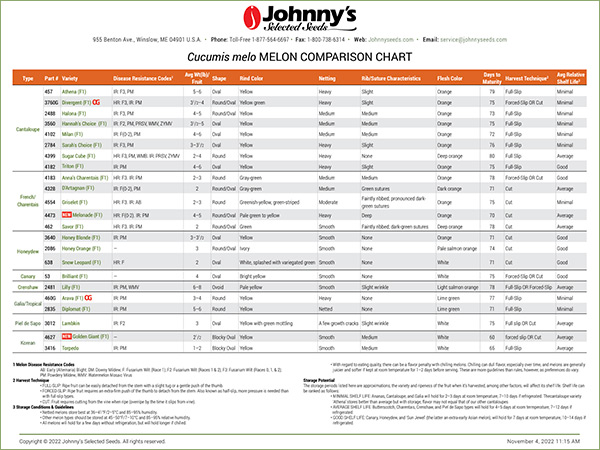
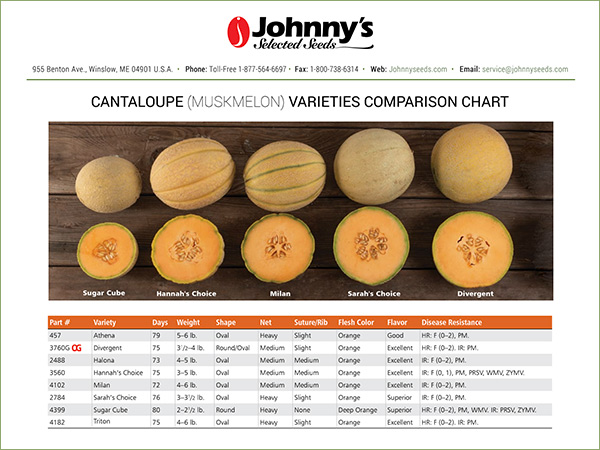
- Cantaloupe Melon Varieties | Comparison Chart (PDF)
- Video: 'Lambkin' Piel de Sapo Melon | How & When to Harvest
- Farm Visit: Mark's Melon Patch – Dawson, Georgia | Johnny's Selected Seeds 40th Anniversary
- Video: How to Tell When Your Charentais-type Melons Are Ready for Harvest
- Melons (Cucumis melo) | Growing Instructions / Technical Production Guide (PDF)
- Melons | Key Growing Information
- Video: Harvesting Your 'Lilly' Crenshaw Melon
- Melon Varieties (Cucumis melo) | Comparison Chart (PDF)
- Cucumber Beetle Lure Instructions | Tech Sheet (PDF)
- Video: Galia Tropical Melon Harvesting | When to Slip off the Vine
- Melon Growing Basics | Seed Starting, Transplanting, Culture, Harvest Indicators, Storage & Shelf Life
The Basics of Successful Melon Growing
• Seed Starting • Transplanting • Culture • Harvesting • Storage
Rediscovering the Perfect Melon
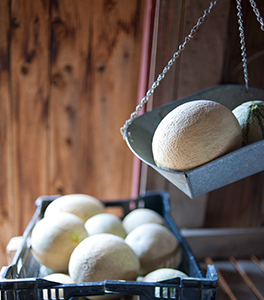
This article is about growing melon types and cultivars in the species Cucumis melo, which includes a diverse range of both netted and smooth melons, but not watermelons. As a group, these are the melons sometimes referred to as hard-shell melons or winter melons.
Watermelons are a different genus and species, Citrullus lanatus var. lanatus, although both types are members of the Cucurbitaceae (cucumber family).
A perfectly ripe, locally grown melon is one of the great taste treats of the produce world. Sweet and fragrant, with a texture that practically melts in the mouth, a fresh, well-grown local melon bears little resemblance to its supermarket counterpart. Most of the melon varieties favored by grower-shippers selling to supermarkets have been bred to withstand the rigors of shipping and handling, for good shelf life and, to make matters worse, are picked before they are fully ripe. Flavor is subordinate to firmness and shelf life for these melons.
Melons provide a unique niche for local market gardeners who can grow them to full ripeness, handle them gently, then deliver a product generally not available in supermarkets. And once consumers taste such a melon, they will not go back to the supermarket types.
In this article, we review the basics of successful melon production, from seed-starting and transplanting to the best way to harvest and store each type. With Johnny's melons, including many varieties selected for adaptability to challenging growing conditions, even a small grower has access to superb melon genetics. With the right varieties and knowledge, you can produce melons that will win over the most discerning buyers, chefs, and guests.
Getting Your Seedlings off to a Strong Start
Multiple plantings of different melon varieties is the recommended way to stagger ripening of your crop and extend the harvest window.
In the North, plants can be set out after the danger of frost has passed, from May through mid June.
In warmer areas, they can be transplanted in March and April.
Although there is some opportunity for making a single planting of varieties with staggered days-to-maturity, it is limited. In general, most melons have relatively similar days-to-maturity, so making multiple plantings is more effective for extending the harvest.
See our Comparison Chart of Melon Varieties to review distinguishing characteristics and features, including days to maturity.
Melons are heat-lovers and tender by nature, and although they can be direct-sown outdoors, we recommend this only under the warmest, most favorable growing conditions. Most growers find that starting seed indoors tips the odds in their favor by:
- Improving germination rates
- Preventing damage by hungry cutworms
- Discouraging damping-off of seedlings
For indoor seed-starting, time your first sowing date to about a month before transplanting, so the seedlings don't get oversized. Lanky seedlings are especially prone to physical damage and transplant shock.
Sow 2–3 seeds, ¼-inch deep in cell flats. To further prevent damping off, use a slightly drier medium than typical for most other crops. Water with care and allow medium to become moderately dry between waterings. Adequate air circulation is essential. If necessary, position small fans over greenhouse benches.
To avoid root damage when transplanting, grow melons in large cells, 50 or 72 cells per tray, so the plants can size up sufficiently before setting out.
Place the trays on a heat mat, set at 80–90°F (27–32°C) until the seeds germinate. After germination, dial the mat temperature back down to 75°F (24°C) to grow the seedlings.
When the plants have developed a couple sets of true leaves, they've reached transplanting stage. They will need to be hardened off for about a week, however, by reducing temperature and water, before moving them outdoors.
Transplanting, Protecting & Pollinating Melon Plants
When there is no longer any danger of frost and the weather is warm and settled, you can set the transplants out, spacing them 18 inches apart, in rows 6 feet apart. Melon seedlings are still tender even when hardened off, and handling them gently will minimize transplant shock and enhance field performance.
Immediately after transplanting, water them in with a fertilizer solution. We use an organic fish emulsion, as it delivers a good nutrient boost without burning the tender transplants.
Melons are typically grown on plastic mulch to warm the soil and prevent weeds. In cooler areas, solar mulch is recommended because it warms the soil better than black plastic. In the South, most growers grow melons only in spring to avoid the high heat of midsummer, though some also grow a fall-maturing crop.
The primary pest problem for melons is the cucumber beetle, which can severely damage the foliage and can also spread bacterial leaf wilt (Erwinia tracheiphila). To protect from cucumber beetles, most growers cover newly transplanted crops with row cover immediately after transplanting. We recommend AG-19 as it provides added warmth as well as insect exclusion. Hoops are not needed. On occasion, high winds may cause row cover to abrade the plants, but usually the damage is minimal and they will grow out of it.
Placing low tunnels with vented plastic over the rows is another option, if melon prices justify the added expense. Low tunnels also protect the crop from excessive rain and provide more heat for young plants, allowing for earlier spring crops and later fall crops.
In order to set fruit, melon plants must be pollinated. Once the vines begin to run and the first flowers appear, be sure to remove the covers or tunnels, or roll up the sides during the day, to allow access to pollinating insects. You may also find setting hives worthwhile, to aid pollination and improve yield.
Watering Your Melon Plants
Melon plants are thirsty and should be irrigated regularly — but only up until the fruits grow to full-size — not full ripeness. Drip irrigation is recommended to prevent excess water on foliage, which can lead to disease. During the fruit ripening stage, the qualities of texture and flavor develop, and the crop should not be watered unless the plants are showing obvious signs of heat stress, such as wilting. Irrigating while the fruits are ripening can result in bland, watery fruits.
Melon Ripeness Indicators & Harvesting
Knowing just when to harvest a melon crop is part art and part science, but a skill you can acquire through observation and practice. To start, there are signs that herald the approach of peak ripeness or indicate its presence for the various types. How much time you expect to pass before the melon will be eaten is the other major consideration (more about this below).
Telltale signs to watch for. Visible or palpable changes at ripeness can involve the following:
- Rind
- Change in skin cast or coloration.
- Cracking, striations, or other markings.
- Slight softening of the fruit.
- Juncture of fruit stem and vine
- Browning and shriveling of tendril and/or leaf most proximal to fruit stem.
- Shrinking of the area where stem attaches to the fruit. When this occurs, it's time to test for ripeness. This is the primary clue growers use to assess ripeness, as it is characteristic of the melon type and relates to how the fruit is usually removed from the vine.
Removal from the vine. At ripeness, some melons "slip" from the vine easily or with a bit of a tug, whereas others must be cut. Most of the slip varieties are said to be ripe at either full slip or forced slip. With a little practice you will learn to recognize the distinctions between the two. The types that must be cut at peak ripeness would be overripe if left until they slipped from the vine.
FULL-SLIP
Ripe fruit can be easily detached from the stem with a slight tug or a gentle push of the thumb. Examples:
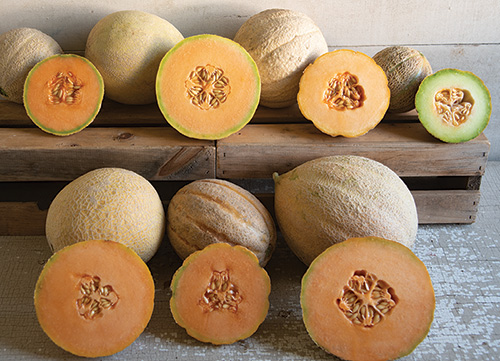
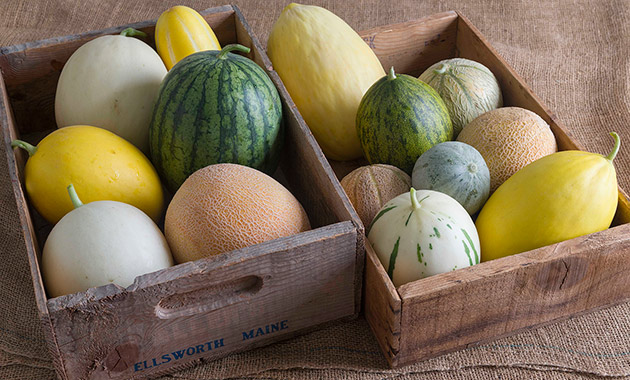
Front, L to R: 'Divergent', 'Hannah's Choice', 'Athena'.
Rear, L to R: 'Sugar Cube', 'Sarah's Choice', 'Halona', 'Eden's Gem.'
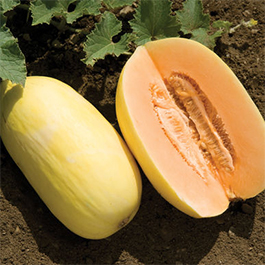
- Cantaloupe. Ripe when skin color "warms" and fruit slips easily from the vine.
- Galia/tropical melons. Ready to harvest when the fruit rind has turned yellow, and develops small cracks where it encircles the stem, indicating the fruit can be slipped from the vine with a gentle tug. Watch video…
- 'Lambkin' piel de sapo. Two choices, depending on your needs and preferences. Melons can be harvested by cutting from the vine to prolong shelf life; OR, for best flavor, allowed to remain on the vine to develop full potential, then slipped. As fruit approaches ripeness, the background color of the rind turns from green to yellow. Watch video…
FORCED SLIP (also known as Half-Slip)
Ripe fruit requires an extra-firm push of the thumb to detach from the stem — more pressure is needed than with full-slip types. Examples:
- 'Brilliant' canary melons are ready when the fruit turns rich, canary yellow and the blossom end of the fruit yields slightly to a gentle press of the thumb. (Fruit can also be cut from the vine slightly earlier.)
- 'Lilly', an extra-early crenshaw, is ready to harvest when the skin is a creamy yellow and the fruit is slightly soft to the touch. Push the melon where it joins the stem to remove the fruit from the vine. (Crenshaws can also be harvested at full slip, however. 'Lilly' can be left on the vine a couple of extra days for extra flavor, and harvested at full slip rather than forced slip, at which point it will be a bit riper and tastier.) Watch video…
CUT-FROM-THE-VINE TYPES
These melons should be cut from the vine when ripe. Examples:
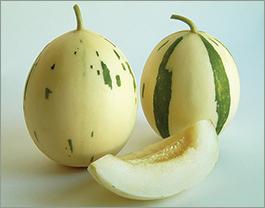
A fabulous, green-splashed/variegated Honeydew variety.
- Charentais melons are ready to be cut from the vine when the smallish, long-stemmed leaf next to the fruit becomes pale, the small tendril nearest to where the fruit attaches to the vine turns brown. Another indicator is a yellowish "warming" of the skin (whereas orange skin color indicates the fruits are overripe). Watch video…
- Honeydew melons, like charentais, have a small, long-stemmed leaf attached to the vine, opposite to where the fruit is attached, which turns yellow when the melons are ripe. Ripeness is also indicated by a "warming" of the skin tone.
When the intention is to ship or store a melon crop, some growers elect to time the harvest to occur before peak ripeness, to extend shelf life, harvesting full-slip types early at the forced-slip stage or harvesting forced-slip types early by cutting them from the vine. Take note that these practices will compromise the flavor.
For more details on when to harvest the various types of melons, refer to the descriptions given on our product pages, and watch our series of melon-harvesting videos. With practice you will learn to harvest your melons at peak ripeness.
Melon Storage & Shelf Life
The storage conditions and periods listed here are approximations — the variety of melon and the ripeness of the fruit at the time it is harvested, among other factors, will affect its shelf life. In addition, needs and preferences vary. Here are some guidelines.
Storage Conditions
- Netted melons store best at 36–41°F (2–5°C) and 85–95% humidity.
- Other melon types should be stored at 45–50°F (7–10°C) and 85–95% relative humidity.
- All melons will hold for a few days without refrigeration, but will hold longer if chilled. With regard to eating quality, there can be a flavor penalty with chilling melons. Chilling can dull flavor, especially over time, and melons are generally juicier and softer if kept at room temperature for 1–2 days before serving. Nevertheless, many people prefer to eat their melon chilled, particularly in hot weather.
Storage Potential
Melon shelf life can be ranked as follows:
- Minimal Shelf Life. Cantaloupe and Galia will hold for 2–3 days at room temperature, 7–10 days if refrigerated. The cantaloupe variety 'Athena' stores better than average, but with storage its flavor may not equal that of our other cantaloupes.
- Average Shelf Life. Charentais, crenshaw, and piel de sapo types will hold for 4–5 days at room temperature, 7–12 days if refrigerated.
When it comes to marketing melons, the eating experience speaks for itself: once you know how good a fresh melon can and should taste, you will be hooked!
Here are some suggestions for establishing and building a loyal following for your melon crop.
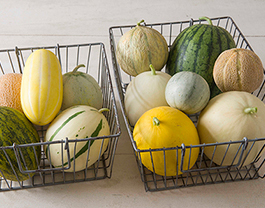
- Mixed displays of melons are colorful and draw attention at farmstands and farmers markets. A great way to encourage customers to try new varieties and entice them to return, provided regulations permit sampling, is to offer them fresh, fragrant chunks of melon on toothpicks.
- Sliced melon plates are a highlight on seasonal menus, so offering several varieties to chefs and restaurateurs is another way to increase sales and generate loyalty. As part of the culinary cocktail trend, melons are being used to adorn a profusion of drinks. And as part of the raw health food trend, melons are exquisite in smoothies and lassis.
- Ethnic markets, too, can be reliable sales channels for melons. Asian markets will appreciate 'Torpedo' and may also be receptive to honeydews. Galia melons are popular among Mideastern populations, and French chefs will be delighted to acquire charentais types.
Learn More
On the whole, growing your own melons is a worthwhile endeavor. There is a learning curve but once you've mastered the fundamentals, melons can be a rewarding and profitable crop. Best of all, you can choose the types and cultivars to grow: no more bland melons for you, your family, friends, or customers. With the right varieties and know-how — even if your summers are short and cool — you can produce melons with premium appearance, quality, and flavor.
If you're thinking of including melons in your growing plans this year, give us a call and let us help. Below are some additional resources to get you started.
Johnny's Resources
- Cucumis melo Melon Varieties • Comparison Chart (PDF)
- Cantaloupe Varieties • Comparison Chart (PDF)
- Cucumis melo Melon Harvesting Tutorials • VIDEOS
- Cucumis melo Melon Production • Tech Sheet (PDF)
Further Reading
- Specialty Melon Cultivar Evaluation under Organic and Conventional Production in Florida • HortTechnology
- Specialty Melon Production for Small and Direct-Market Growers • NCAT/ATTRA Sustainable Agriculture (PDF)
- Specialty Melon Variety Offers High Tunnel Options • Vegetable Grower's News
- Cantaloupe: Safe Methods to Store, Preserve, and Enjoy • UC Davis/Agriculture & Natural Resources (PDF)


